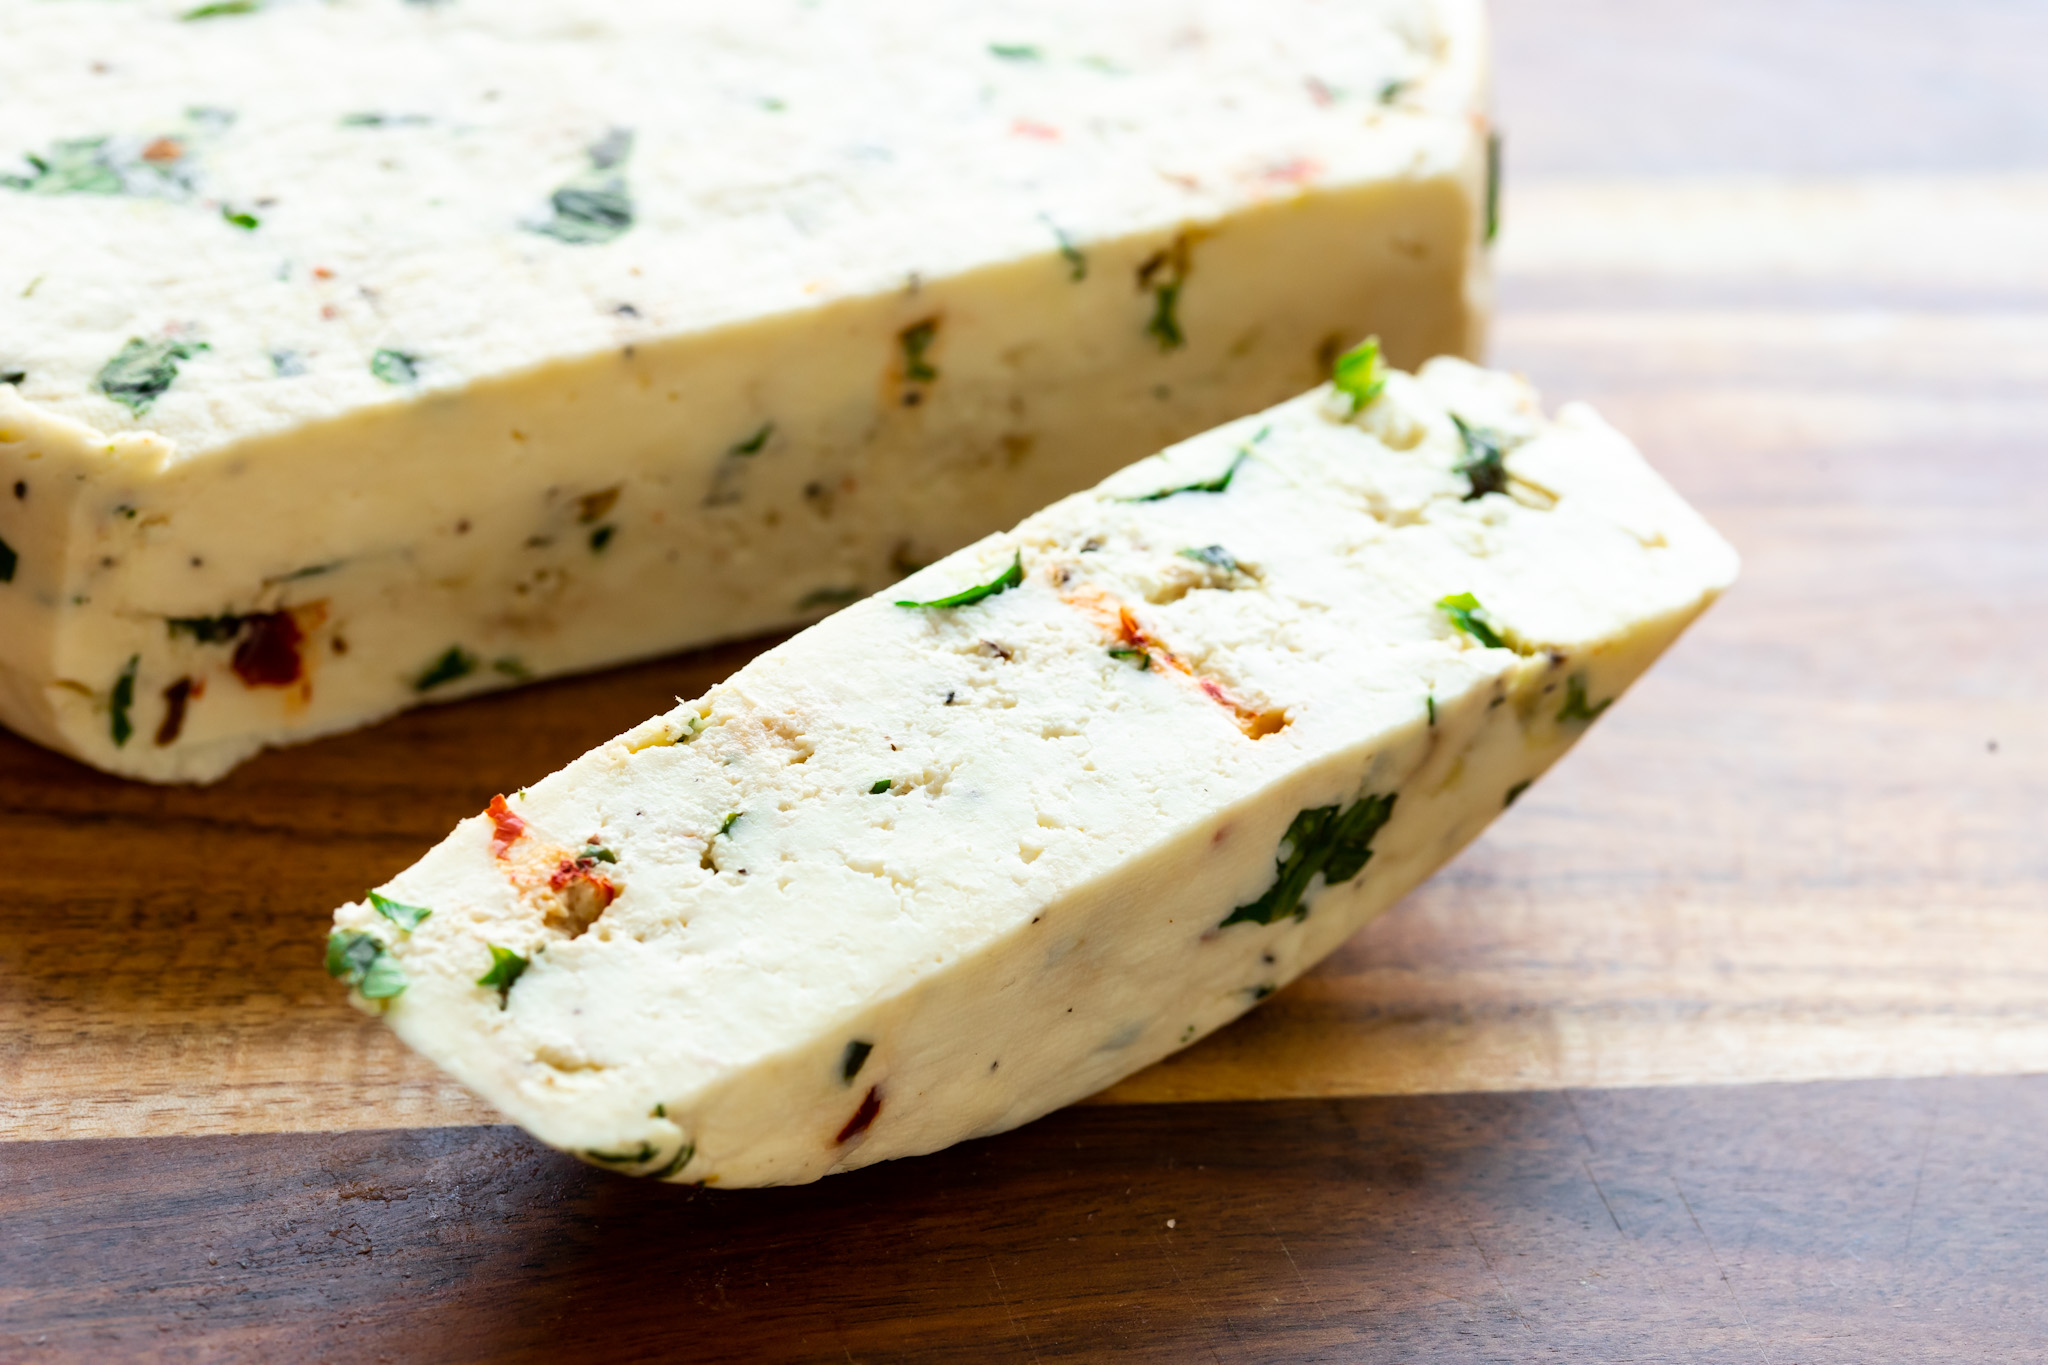
Here’s my favourite recipe for Homemade Masala Paneer. I infuse the cheese with a handful of herbs and spices to give it a beautiful flavour and colour from within. My recipe uses ground black pepper, ginger, chilli flakes and fresh coriander leaves. However, you can customise your block of Homemade Masala Paneer to your taste by using your favourite herbs and spices.
My recipe has been perfected over the years to produce a soft and squidgy cheese that cubes and slices beautifully for curries and crumbles like a dream for paratha, kulcha, samosa and bhurji.
How to use Homemade Masala Paneer
You can of course, use it fresh, just as it is for a melt-in-the-mouth texture, or pan-fry it to create a crispy, golden crust. It’s also a delicious addition to Indo-Chinese favourites like Chilli Paneer and Paneer Manchurian.
Homemade Masala Paneer
How to curdle milk for Homemade Masala Paneer
My preference is to use lemon juice to curdle the milk. This can be either fresh or bottled lemon juice.
You can also use vinegar, citric acid, yoghurt or even leftover whey from a previous batch of paneer to curdle the milk. For 2.5L milk you’ll need the following quantities of each:
- 2 tbsp white vinegar mixed with 250ml water
- 1 tsp citric acid mixed with 250ml water
- 100g sour natural yoghurt whisked with 2 tbsp water
- 250ml sour whey
What other herbs and spices can I add to Masala Paneer?
This recipe is highly customisable and can be transformed with just a few changes to the herbs and spices used. Here are some of my favourite Paneer flavour infusions:
- My original Masala Paneer: Ground black pepper, ginger paste, chilli flakes, fresh coriander.
- Indo-Chinese Masala Paneer: Chinese 5-spice, ginger paste, green chillies, chopped spring onion.
- Mediterranean Masala Paneer: Sliced olives, chopped sundried tomatoes, garlic paste, dried oregano, fresh basil.
- Jamaican Jerk Masala Paneer: Ground allspice, dried thyme, dried garlic powder, chopped scotch bonnet chilli.
- Tex-Mex: Smoked paprika, ground cumin, dried onion powder, chopped coriander.
How to make soft paneer
This is a super common question and one I’m asked often. The answer is simple: Use milk with ample fat content and curdle the milk slowly you don’t shock the curds into separating quickly. Dilute the acid with water to encourage a slow separation. The last thing to remember is to ensure you don’t press it too hard. A small amount of moisture in the cheese will keep it squidgy. Ultimately, try to introduce temperature changes gradually.
Simple changes you can make for softer paneer:
- Dilute the acid when using lemon, vinegar or citric acid to facilitate a gentle separation of curds and whey.
- Use high-fat milk (this will also improve yield)
- Rinse the cheese in warm water instead of cold

Paneer for sweet and savoury dishes
Follow my recipe to make perfect paneer, whatever your intended use for it may be. Whether you want to make cubes for Chilli Paneer and Paneer Tikka, crumble it for Paneer Kulcha or use the drained and kneaded chhena for making Rasmalai.

The Best Homemade Masala Paneer: Troubleshooting
Full-fat milk (at least 3% fat) produces good quality paneer. Try to find the least homogenised, least processed milk possible for better yield. If the milk is overly processed, it will not curdle or may only produce a small amount of curds. This is because the heating process integral to long shelf life damages the proteins in the milk.
No, you can also use vinegar, citric acid, yoghurt or even leftover whey from a previous batch of paneer to curdle the milk. See my note above for quantities.
Some people advocate a small amount of water in the bottom of the pan. I’m not one of those people and that would only dilute our lovely full-fat milk. Instead, I prefer to rub the base of the pan with oil. Anything milk that burns will lift off easily once you’re done making the paneer. Don’t scrape the base of the pan when making paneer as the burnt bits can lift off and leave your cheese speckled with burnt milk solids.
You can, however, the yield will be much less depending on fat content and it may also be quite firm to eat.
I would advice mixing both full-fat milk and cream (a 3:1 ratio). Using pure cream may be too fatty and may prevent the paneer from setting.
350g.
Yes. Simply bring it to the boil in a large, heavy-based pan and the sourness of the milk will cause a natural separation to occur. Strain the milk as directed in my recipe below.
Add more of your chosen acid, e.g. lemon juice, little by little whilst stirring gently in a figure of eight motion. If the milk still doesn’t separate, your milk may be too processed/filtered to make paneer. Don’t worry, you can still use it as buttermilk for baking.
The possibilities are endless! Use it in sweet and savoury baking, in particular, cake and bread baking. You can also use leftover whey for making Indian bread like roti, thepla, naan, paratha and bhatura. Or add it to your morning smoothies for a low-fat protein boost. Kadhi made with leftover whey is deliciously sour. Leftover whey can even be used to separate more milk for making paneer again. It’s super nutritious and versatile. Keep it bottled in a clean container for up to 2 weeks.
Sure! Wrap it well and freeze for up to 3 months, Defrost at room temperature and eat within 48 hours.
This perfect homemade paneer will keep well in the fridge for up to 3 days. Wrap it well to ensure it doesn’t dry out.


Equipment
- Large, heavy-based pan
- Muslin or cheesecloth
- Colander or sieve
- Large bowl
Ingredients
- 2.5 L full-fat milk at least 3% fat Note that ultra-filtered milk isn’t suitable for making cheese
- 100 ml lemon juice
- 250 ml water
- 1/4 tsp any flavourless oil to grease the base of the pan
- 1 tsp salt
- 1/4 tsp freshly-ground black pepper
- 1/2 tsp chilli flakes
- 1/2 tsp grated ginger or ginger paste
- 1 tbsp freshly-chopped coriander
Instructions
- In a bowl or jug, mix together the lemon juice and water.
- Use a kitchen towel dipped in oil to grease the base of the pan. This will stop the milk from burning on the bottom.
- Pour the milk into the pan and heat over a medium flame. Don’t stir the milk too much as we don’t want to create too much froth. Don’t leave the milk unattended, it can boil over quite quickly. Once the milk comes to a boil, switch the heat off.
- Slowly add the lemon and water mixture and stir the milk very gently to disperse. Imagine gently drawing a figure of eight in the pan. If the milk isn’t curdling, add more of the lemon and water mixture until it does.
- You’ll know the paneer is ready when the curds look like little white clouds floating the a yellow/green-ish water (this is the whey).
- Line a colander or sieve with a clean muslin or cheesecloth. You can wet the cloth if isn’t sitting in the colander well. Place the colander over a large bowl to catch the drained whey.
- Pour the mixture into the colander and allow the whey to drain out.
- Next, transfer the bundle of drained curds (along with the muslin) into a bowl while you pour the whey into another bowl or simply swap it with another bowl.
- The curds now need to be washed to remove any excess acidic flavour. Pour plenty of warm water over the cheese and agitate with a spoon to wash away the sourness. I use around 1L water for this process.
- Once washed, dissolve the salt in another 500ml warm water and pour this over the curds to season it. Sprinkle over the black pepper, chilli flakes, ginger and coriander. Mix well.
- Wrap the muslin over the top of the curds, as flat as you can get it. Press gently with your hands to drain off excess water.
- Place a flat plate over the top and weigh the curds down with something heavy (like a few tins of beans, a mortar or books) to drain off remaining water and lightly set the paneer. The heavier the weight you apply, the firmer set your paneer will be. I like to apply a light weight at this point so that I can mould it properly later.
- After an hour, the paneer is ready to use. It may be slightly crumbly. If you prefer a firmer set for cubing and slicing, either set in the fridge overnight or do as I do and mould it in a dish, tin or bowl with more pressing.
Optional step for moulding the paneer:
- Transfer the lightly-set paneer to a small tin or ceramic/glass dish, about 12cm wide. Keep it in the muslin/cheesecloth for easier unmoulding later. Press the paneer in with the back of a spoon. It doesn’t matter of it breaks and crumbles as you’ll be pressing it again shortly. Wrap the paneer up with the muslin and apply more pressure with a plate and weight.
- Pop the whole thing, plate and weight included in the fridge overnight to set. The next day your block of fresh paneer will be ready to cube and slice for all your favourite paneer recipes.
Recipe Video
Sanjana’s Notes
- My preference is to use lemon juice to curdle the milk. This can be either fresh or bottled lemon juice.
- You can also use vinegar, citric acid, yoghurt or even leftover whey from a previous batch of paneer to curdle the milk. For 2.5L milk you’ll need the following quantities of each:
- 2 tbsp white vinegar mixed with 250ml water
- 1 tsp citric acid mixed with 250ml water
- 100g sour natural yoghurt whisked with 2 tbsp water
- 250ml sour whey
Pin this recipe for later!

If you like this, you’ll love my recipe for Paneer Kulcha


hey
Saturday 12th of December 2020
Willie G youllied
Hi, I do believe this is a great website. I stumbledupon it ;) I'm going to revisit yet again since i have saved as a favorite it.
Money and freedom is the greatest way to change, may you be rich and continue to guide others.
Sheetal
Sunday 6th of September 2020
This recipe was so easy to follow and came put perfectly. Loved it .
Crispy Paneer & Grilled Nectarine Salad
Thursday 3rd of September 2020
[…] after a sharing platter worthy of your Instagram grid, this is the salad for you. I use my Homemade Masala Paneer recipe to give the salad a central focus; it’s crispy, spicy and creamy all at […]